figureタグを使う話の続き
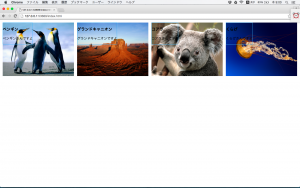
figureタグのなかにfigcaptionを書いておけば、画像の下にfigcaptionで書いた内容が表示されることは前回書いた。それを画像の中に書いてやることもできるのは容易に想像できる。positionプロパティを使ってレイヤにしてやればいい。positionは親要素にも書いてやらないとz-indexが効かない。cssは以下。
|
1 2 3 4 5 6 7 8 9 10 11 12 |
figure{ width: 24%; display: inline-block; margin: 5px; position: relative; } figcaption{ position: absolute; top: 0; left: 0; z-index: 2; } |
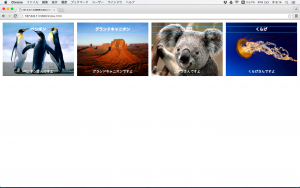
 次に表題と説明を上下に分けてみる。ついでに文字色を白に文字も中央揃えにしてみた。
cssは以下
|
1 2 3 4 5 6 7 8 9 10 11 12 13 14 15 16 17 18 19 20 21 22 23 24 |
figure{ width: 24%; display: inline-block; margin: 5px; position: relative; } figcaption>h3{ position: absolute; z-index: 2; color: #fff; top: 0; left: 0; width: 100%; text-align: center; } figcaption>p{ position: absolute; z-index: 2; color: #fff; bottom: 0; left: 0; width: 100%; text-align: center; } |
|
1 2 3 4 5 6 7 8 9 10 11 12 13 14 15 16 17 18 19 20 21 22 23 |
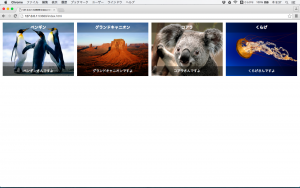
figcaption>h3{ position: absolute; z-index: 2; color: #fff; top: 0; left: 0; width: 100%; text-align: center; background: rgba(0,0,0,.3); margin: 0; padding: 3% 0 3% 0; } figcaption>p{ position: absolute; z-index: 2; color: #fff; bottom: -3%; left: 0; width: 100%; text-align: center; background: rgba(0,0,0,.4); padding: 3% 0 3% 0; } |
backgroundで透過色を指定しているだけだが、ブラウザが持っているh3やpのプロパティを初期化していないので、ここで指定し、下の部分はbottom指定も変えている。
最後にこれをマウスオーバー時にキャプションが現れる形にしてみる。ここではopacityを0、すなわち完全透過で非表示にし、:hoverでopacityを1にして、透過なしにする。その際若干の時間差をつけてやるといい。それはtransitionを使う。その部分のcssは以下。
|
1 2 3 4 5 6 7 8 |
figcaption{ -webkit-transition: 1.5s; transition: 1.5s; opacity: 0; } figure:hover figcaption { opacity: 1; } |
これについてはデモをご覧ください。
なお、もっと上手なエフェクトについては
http://www.nxworld.net/tips/css-only-caption-effect.html
をご覧ください。とても参考になります。

